The best way to design and assemble backflow and pump enclosures is to use marine-grade aluminum, polyisocyanurate insulation and a modular-panel design. An enclosure that is built in this manner will provide the best protection for your equipment. It will also be able to withstand the elements, but at the same time, provide easy access for testing.
It’s important to understand that not all backflow enclosures are the same. Some are assembled before they’re shipped, others use spray-on insulation that leaves air gaps and collects dirt, while others are not ASSE 1060-certified.
Let’s take a look at the design and assembly process for Safe-T-Cover aluminum enclosures to see how it compares.
Backflow Enclosure Design: Side Panels
The first step in putting together a high-quality aluminum enclosure is constructing the side panels. Each one is fitted with 1½ inch of polyiso insulation.
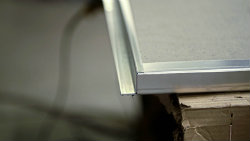 The insulation is not glued to the enclosure panel, it’s cut to the exact dimensions of the panel, form-fitted around the edges of the insulation and held in place by rivets. A 2x4 piece of redwood also provides additional structural support.
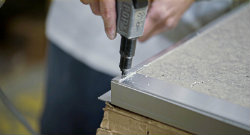 This material is commonly used in the roofing industry and is superior to the spray-on insulation because it won’t crack over time or leave air gaps. The R-value for polyisocyanurate insulation is the highest for rigid-board insulation at an average of 6.5 per inch. Standard Safe-T-Cover enclosures have 1.5 inches (R-9) of polyisocyanurate insulation in the walls and 3 inches (R-18) in the roof. By using such a high-quality material, the enclosures more than meet ASSE 1060’s requirement for insulation.
Backflow Enclosure Design: Roof Panel
The design of Safe-T-Cover roof panels is very similar to that of the side panels. The design process is essentially the same. The biggest difference is the roof panel may get a larger 2x6 redwood beam for added strength and rigidity and 3 inches of insulation is used on the larger model enclosures. 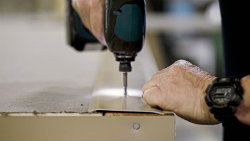
How Our Backflow And Pump Enclosures Are Shipped
Safe-T-Cover enclosures are made using a modular panel design. This allows us to ship our enclosures flat to the customer or project site for assembly and to help keep shipping costs down. Each shipment comes with a step-by-step instruction guide, diagram, and installation hardware.
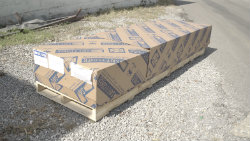
The installation hardware includes anchoring brackets, roof clips, anchors and screws. You’ll also receive a masonry bit and magnetic chuck. The only tools you’ll need are a drill, hammer, and a ¾-inch wrench.
And with a little help, you can have your enclosure together in less than an hour.
Learn how backflow enclosures are helping to save lives.
How To Assemble Safe-T-Cover Backflow and Pump Enclosures
A good practice before you begin assembling the enclosure is to mark the concrete base for the outside of the enclosure (3 inches wider than ID and 3 inches longer than ID). Now locate the individual panels that will make up the enclosure.
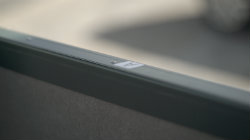 To make assembly a breeze, each panel is marked by descriptive stickers with letters on them. Panels marked with a letter “A” (on the right) are the sidewalls, letter “B” panels are the front and back of the enclosure, “C” panels are the access panels or doors, and the “D” panel is the roof.
The “A” panels will have a channel along each end where the “B” panels will fit into them. You’ll secure them with the provided hex-headed screws. Continue this method for the remaining A and B panels.
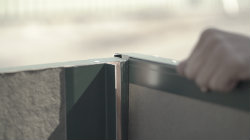 The “C” access panels (on the left) can now be set in place before installing the roof panel(s). Each access panel will have a foldable and pad-lockable handle, are completely removable, and have a drain flap.
Next, you will want to place the “D” panels (roof panels) in place. They’ll have channels along their edges where the A and B panels will fit into them. 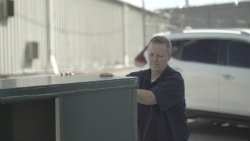
Once this is done, secure the inside and outside anchoring brackets to the concrete slab (lower left image). Using the hex-headed screws, you’ll attach them to the B panel studs and the concrete anchors to secure it to the concrete slab.
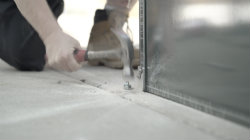 Next insert the Inside Roof Clips into the “D” (roof) panel at the “B” panel studs using a hex headed screw for each.
If your enclosure is one of our dual models that requires a two-piece roof, fasten the Inner Roof Connection Brackets into place using hex headed screws covering the exposed 2x6 redwood studs.
Now you’ll simply attach cover plates over the exposed seams on the exterior of the enclosure roof.
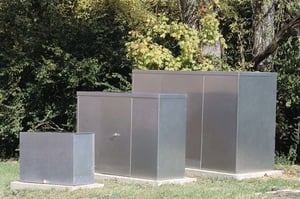 Safe-T-Cover uses marine-grade aluminum, a high-quality metal that will typically outlast the equipment it is covering. Our enclosures come in four standard colors at the base price. Check our enclosures page to find a full list of 20 more colors that are available for an additional cost. Being able to choose the right color can often satisfy an owner’s objection to a big shiny box!
If you'd like to see how one of our enclosures come together, here's a video you can watch.
You can also check out our free guide: “How to Buy a Custom Enclosure.” This new checklist is designed to walk you through all the necessary steps for designing and buying a custom enclosure.


